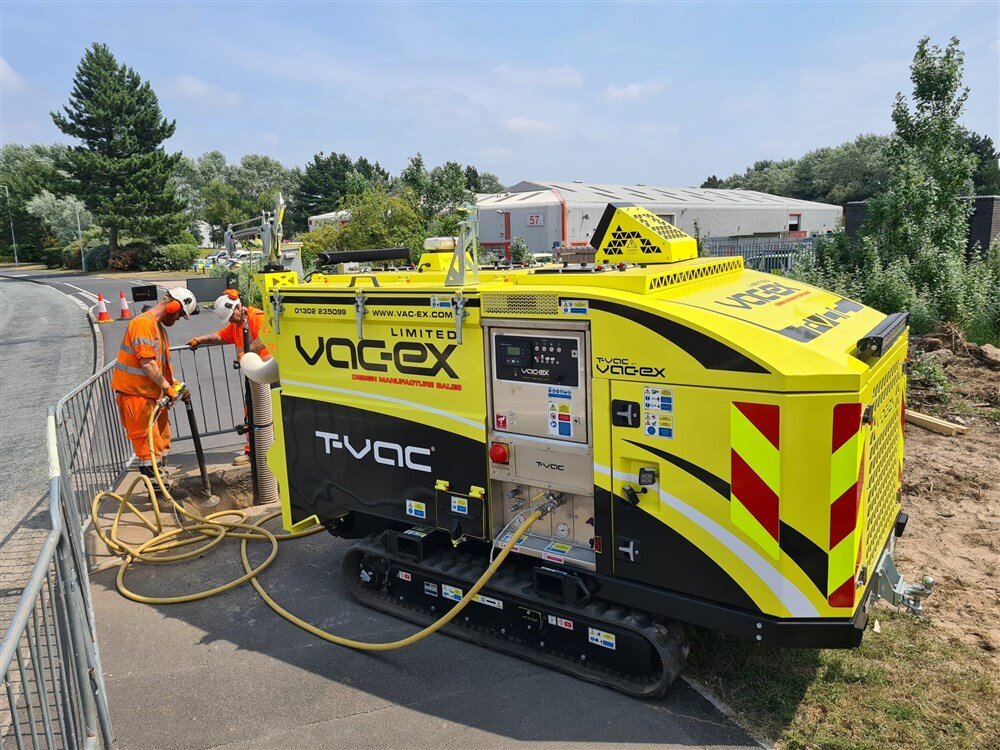
Menu
Make sure you have a clean rag to wipe the dipstick once you have pulled it out.
1. Check the engine oil level before starting or more than 5 minutes after stopping the engine.
2. Remove the oil level gauge, wipe it clean and reinstall it.
3. Take the oil level gauge out again, and check the oil level.
CAUTION
To avoid personal injury:
Isolate the AIR-VAC
Lift the Dashboard inspection hatch
Push the battery down from the top and pull it out
Turn the remote upside down and push the battery to the right to release
Switch the batteries
Start up the unit
Ensure the remote isolator is not engaged and press and hold the power button in
AIR-VAC - HT014 - How to read the number of hours of operation on the Air-Vac OperationRecognition of radio identification code of the portable control unit (Rc400 G2B)
In the RC400 radio remote controls, the portable control unit works with the linked central unit in radio mode through a unique identification code. When a portable control unit (or a central unit) is replaced, it’s required to update this code to ensure that the system works again. The portable control unit connected with the serial cable works always (the identification code is ignored).
Recognition procedure:
Note: if a graphic display is installed on the portable control unit, after the second power on, it can take even one or two minutes to load the display configuration. Meanwhile, on the display, some messages will inform of the work in progress. The display inside the receiver will show a rotating segment until the process has finished.
When the display configuration has been completely transferred the display inside the receiver will show “1-“ (or “1P”).
Applicable to AIR-VAC Serial No. 002 onwards
When the PCU inclination exceeds the safety limit, the PCU internal buzzer
is activated (Tilt sensor pre-alarm signal); if the PCU inclination is eceeds the
safety limit for more than 2 seconds, all functions are disabled by the external
MC2M controller.
Reset the remote.
Has the battery lost charge?
Tow ball and connections
Check that:
Breakaway cable
Use a breakaway cable or secondary coupling. This engages the trailer’s brakes (if fitted) or stops the trailer if it becomes detached from the car.
Check that:
Wheels and tyres
Check that the tyres on both the car and trailer:
Check that each tyre has a tread depth of at least 1.6mm:
Check that the wheel nuts and bolts are tightened to the correct torque.
Check that mudguards are fitted to the trailer and they’re secure.
Lights and indicators
Check that there’s no damage to the lights, and that they’re all working correctly.
Is the 7 core cable and plug undamaged?
Even seemingly "minor" damage to a ratchet strap can significantly reduce its capacity to hold objects and increases the chance that the ratchet strap will fail during use. Therefore, it is very important that ratchet straps are regularly and properly inspected. In reality, there simply is no such thing as "minor" damage. If you are not sure whether a ratchet strap is damaged, DO NOT USE IT.
If ratchet strap identification tag is missing or not readable.
Holes, tears, cuts, snags or embedded materials.
Broken or worn stitches in the load bearing splices.
Knots in any part of the webbing.
Acid or alkali burns.
Melting, charring or weld spatters on any part of the webbing.
Excessive abrasive wear or crushed webbing.
Signs of ultraviolet (UV) light degradation.
Distortion, excessive pitting, corrosion or other damage to buckles or end fitting(s).
Any conditions which cause doubt as to the strength of the ratchet strap.
Synthetic web ratchet straps may be re-webbed using existing hardware if the ratchet strap manufacturer determines the hardware is reusable. All re-webbed ratchet straps utilizing used hardware shall be proof tested to 150% of the WLL and certified. Frankly you are better off just replacing the entire unit.
You should never ignore ratchet strap damage or attempt to perform temporary field repairs of damaged ratchet straps (e.g., tie knots in the webbing, etc.)
For further guidence:
https://www.gov.uk/government/publications/load-securing-vehicle-operator-guidance/load-securing-vehicle-operator-guidance
Load and weight limit
Check that:
Find your car’s weight limit
The vehicle manufacturer’s plate gives information about weight limits for your car. Check the car’s handbook if a plate isn’t fitted.
Weight Description
Weight 1 Maximum weight of the car on its own
Weight 2 Maximum weight of the car and trailer combined
Weight 3 Maximum weight for the front axle of the car
Weight 4 Maximum weight for the rear axle of the car
The maximum weight includes passengers, other loads, and fuel.
Trailer with no braking system
The loaded trailer:
Trailer with braking system
The car and loaded trailer must not weigh over the second weight shown on the car manufacturer’s plates.
When you’re driving
You must not drive faster than the speed limit for the type of road.
If the trailer starts to snake or swerve, ease off the accelerator and reduce your speed gently. It’s a sign that either:
Don’t brake harshly on a bend, as it makes the trailer unstable. Reduce your speed in plenty of time when approaching any hazard.
You must not drive in the right-hand lane / fast lane of a motorway with 3 or more lanes.
If you have accidentally run the T-Vac out of diesel or a fuel filter change is required, you need to follow theses instructions:
The manual pump is engauged by a cam on the engine. It may require a turn of the engine to engage the cam before the pump will work.
Do not remove any pipe work from the fuel system to try to bleed out trapped air.
If the problem still persists, contact us.
© 2018 COPYRIGHT VAC-EX LTD | TERMS AND CONDITIONS | PRIVACY POLICY | COOKIES